Back when I started learning programming, it was always fairly simple to achieve the canonical first step of accomplishments, that is, to get the system to announce that you are ready to do more by displaying “hello world” on the screen.
In most systems then, there was a command prompt somewhere that would usually do that when you would type, say:
PRINT "hello world"
.
Things have changed a lot since the early 80s. In some fields like fashion, I would argue it’s a good thing, but we’re definitely not going in the way of less complexity.
Now if you’re interested in web-oriented visualization and want to do it with d3.js, it’s still fairly simple, but it is built upon a number of technologies that you’re supposed to know a little. Front-end developers live and breathe the web and have been exposed to all things javascript, HTML, CSS, you name it, in enormous doses. Many developers probably have, at some point, tried to interface with the web and know enough of that to get started. So for this crowd, the amount of things you need to know to crack d3 code seems negligible, because they know all that and they are very familiar with it, just as well as people knew the first names of Friends characters by the end of the tenth season.
But what about those who didn’t? and the people who don’t see themselves as developers ? do they have to reimmerse themselves in 10 -odd years of web development history to get started? It turns out that this sum of knowledge, while not insurmountable, is certainly not trivial.
So without further ado, let’s get started
We’re cooking an omelette
And when we do, we need a few things: a pan, a recipe, eggs and stuff, a stove and then plates, knives and forks, etc.
The pan: a text editor
The first thing is really the pan. If you don’t have one when cooking eggs, you borrow one or go buy one. In our analogy the pan is the text editor. This is the tool with which you are going to make the files that will constitute your visualization.
There was a time when it was ok to use notepad (textedit if you are of the apple persuasion). And it’s still possible, but you are not making your life easier. What I recommend instead is that you get a hold of a copy of SublimeText2. (http://www.sublimetext.com/2). There are windows versions. And Mac versions. And linux versions. For windows users, there is a mobile version so you don’t need administrator access to install it. There is a free, unlimited evaluation version, but unless you can’t spend $69, I strongly recommend that you buy it. Sublime Text 2 has a nearly infinite amount of niceties built in. And unlike some other powerful text editors, where the best features are only understandable by the tech masters, what’s really nice about Sublime Text 2 is that it would make you gain time even if you are an absolute beginner. One such nice things that it does is detect what language you are working with, automatically color and format the words as you type them depending on the category they fall in, and when possible, suggesting the word you are trying to type, automatically format and indent your code, all in a very unobtrusive and pleasant way. This will really help you troubleshoot problems like strings not closed properly or loose closing bracket which typically consume a lot of time.
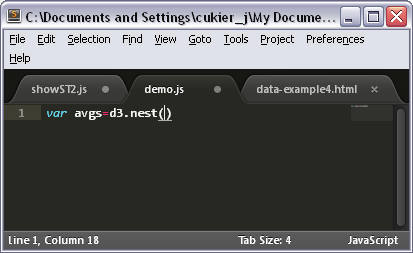
Let’s type a fairly common d3 statement to see how SublimeText2 can help. First, it recognized the var keyword as such and writes it in italics and cyan. Second, when I type my opening parenthesis, it adds a closing one, and as long as my cursor touches either it underlines them both.
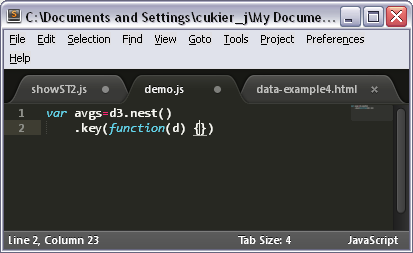
Let’s carry on. The function keyword is highlighted in italics cyan too – useful. The opening/closing thing works for curly braces too.
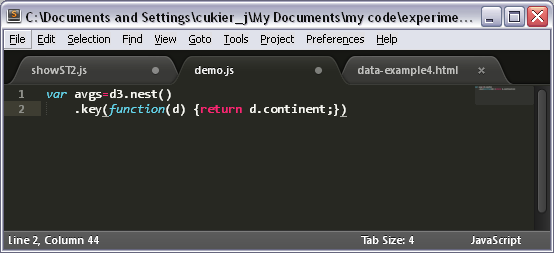
The return statement is highlighted in red. With the cursor on the closing parenthesis, we are starting to get a feel that the underlining function is a useful safety net
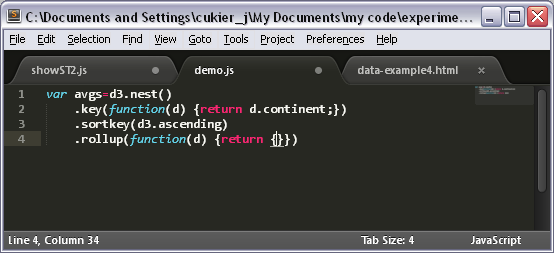
We now have four consecutive opening or closing curly braces and parentheses. Typically, this is where errors sneak in, and where sublime text 2 really shines.
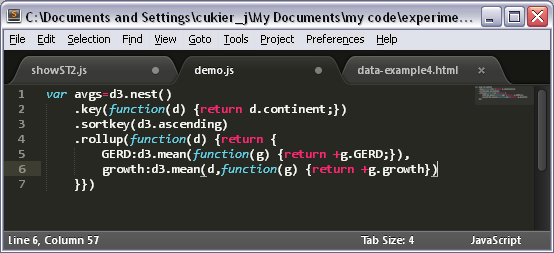
And we now have 5 consecutive closing curly braces and parentheses. This is fairly common in d3 code. Is the order correct? Thank you Sublime Text 2!
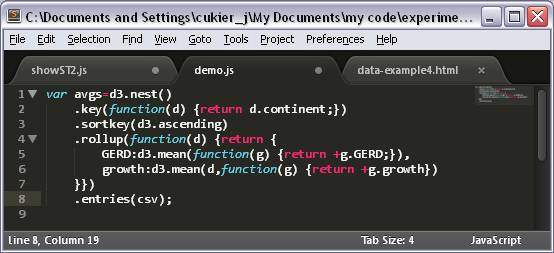
When moving the cursor to the left side, where the line numbers are, we notice down-pointing arrows. We know our code is correct, and we don’t want to see it again, so…
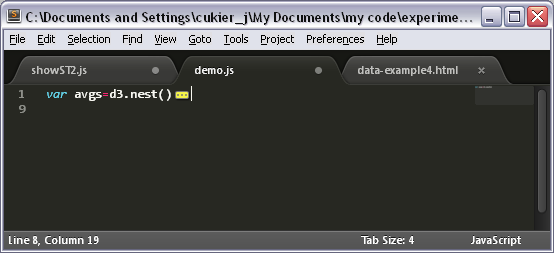
we just click on the top one to collapse this section. If we need to edit it again we can expand it.
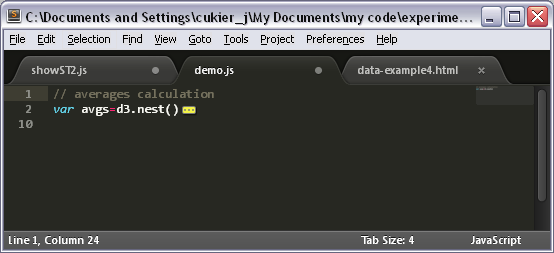
Finally, we add a comment above. Notice the syntax highlighting, comments are colored with an unobtrusive dark grey.
The recipe: a basic file structure
In d3, you can’t really type a “print” command from a prompt. You need to write some files, which are loaded by a browser (that’s your “plate” in the metaphor, but let’s not get ahead of ourselves).
You are going to need up to 5 types of files.
First, an html file. This will be the file that your browser will read, either locally, or uploaded on a website. We’ll get to cover this in detail in a minute.
Second, believe it or not, you are going to need the d3 library, which is also a file. You may link to the version on the d3js.org site, and so not worry about having the actual file handy. That has advantages (like the one we just said, also, you’re pretty sure to always have the latest version on hand), and two problems. First, you always need to have a live internet connection, so there’s no working in the park outside of free wifi space (for example), and also, it will probably be slower than having the file locally or on your own web space. And if having your own web server seems kind of scary, I’ll show you in a short while that it’s not.
The three next kind of files are optional, but hey.
The third file is a javascript .js file which would be where you put your code. Some people would rather put all their code in the html file, which is an option, especially for short programs. Personally, I prefer having a separate file. So to make d3 work, you need some script, but it doesn’t have to be in a separate file.
The fourth file is a style sheet, or css file. This can be used to define some formatting options, for instance to make all your circles blue by default, or some circles that meet some pre-defined criterion. Like the javascript file, any style information can be contained within the html file, but unlike the script, it is completely optional. I also like to keep it separate from the html.
Finally, you may want a data file, you know, with data (csv, txt, json, xml…). If you have lots of data to visualize, it’s easier to keep it in separate files than in variables within the script. But it doesn’t have to be that way. And you could also use d3 without data.
The ingredients: contents of the files
The HTML file
So let’s see how this articulates by looking at a typical d3 html file. I am using templates which I try to change as little as possible from project to project.
<!DOCTYPE html>
<html>
 <head>
   <meta http-equiv="Content-Type" content="text/html;charset=utf-8">
   <title>My project</title>
   <script type="text/javascript" src="../d3.v2.js"></script>
   <link href="style.css" rel="stylesheet">
 </head>
 <body>
   <div id="chart">
   </div>
   <script type="text/javascript" src="script.js"></script>
 </body>
</html>
Well. That is certainly longer than the BASIC one-liner (and we haven’t even printed “hello world” yet).
Let’s take this piece by piece.
The first line is a doctype declaration. What this does is that it tells your browser that what follows should be interpreted as standard, HTML5-compliant HTML (standards mode). If you omit the doctype documentation, your browser will read the html in “quirks mode“, i.e. by replicating the non-standard behavior of Nescape 4 or IE5. You can still try to run d3 under quirks mode, but don’t be surprised if your HTML doesn’t behave as expected.
The doctype declaration doesn’t have to be more complicated than <!DOCTYPE html>.
The second line opens the html document proper. Technically, it’s ok to omit <html>, <head> and <body> tags in HTML5. The document will still be considered valid by tools like the W3C validator. But it seems that some browsers, in some complex cases, don’t like that so much, and I as a person find it more convenient to find those tags when reading code.
The next line opens the header section of the document. Again, it’s not absolutely necessary, but I consider it helpful to explicitly differentiate the header from the rest of the document.
The next line, which goes
<meta http-equiv="Content-Type" content="text/html;charset=utf-8">
is not absolutely required either. It specifies the encoding of the page, that is, what kind of characters will be seen in the page. Since I use non-ascii characters often, being French and all, I make sure to use it all the time. After all, this is a template, not something I type from beginning to end each time.
Next, we specify a title. This is what will appear in the title area of your browser, or, more likely, as the name of your tab.
In the next line, we load the d3 library. This is my preferred syntax. This is how my files are set up:
I have a directory where all my d3 projects are, and in this directory, I am also keeping (and maintaining reasonably up-to-date) a version of the d3 library, a file called d3.v2.min.js. (min stands for minified, which means that it’s not meant to be read by persons, but it’s faster to load). All my projects proper are in folders within that directory. So my html files are one level down from where the d3.v2.min.js file is kept. This is why the src attribute reads “../d3.v2.min.js”: the ../ part means, look one level up. If the d3.v2.min.js file were on the same directory where I keep my html, I would write src=”d3.v2.min.js”, if I kept it within a specific directory like “d3″, I could write src=”../d3/d3.v2.min.js”, and finally, there is always the option of getting it from the website, src=”https://d3js.org/d3.v2.min.js”.
I don’t have to load the d3 library then. I could have done it at the end of the page. The only requirement is that it should be before the script that will use it. But honestly, the file is so small that it doesn’t make much of a difference (9ms on my machine).
Next, I link to a style sheet. With this syntax, I am assuming that my style is specified in a file called style.css which will be in the same directory as this html page. And if there is no such file, it’s not a problem. It doesn’t prevent the page to load.
Instead of using this syntax, I could have written:
<style>

... // my style definitions

</style>
in the html file. And frankly, it is sometimes more convenient. But again, for the general case, it’s just as well to leave it like this.
Note that style information should always be in the header part of the file.
And that concludes the header, as noted by the closing tag </head>. Even if we use the <head> tag to mark the beginning of the header section, we may omit the closing tag </head>, and still get away with a valid (and slightly shorter) document, but I keep it for clarity’s sake.
The next part starts with <body>, and is where the content proper, which will get displayed on the screen, is described. <body> and </body>, just like <html> and <head>, are not mandatory, but do help, somewhat, to make the document easier to read.
So what do we find in the body section? Here, I’ve kept it very simple but also close to the conventions I use.
There is one <div> element, which is the basic building block of HTML, and with an id attribute – a document-wide, unique identifier – called “chart”.
Then, there is the <script> element, which is calling the javascript code we are going to use to create our visualization. It’s at the very bottom of the page, actually just before the closing tags (which, again, could be omitted, but let’s not).
Like for the style element, it is possible to leave the script inside the html document. Instead of using a src attribute – which, incidentally, assumes that the script is within the same directory as the html document with this syntax -, we can write:
<script>

// all our javascript instructions

</script>
And that’s it for the html document! A final word about the contents of the <body> element. In most of my projects, there is an interface such as buttons or controls which is also done in HTML. In that case, the contents of the <body> element get more complex. I would add a button to tweet the page, copyright notices, and other stuff. But I almost always have a <div> element with an identifier named “chart”.
ok, so now that you’re finished with writing your html file, you must save it under any name and use the “.html” extension (or .htm, but why no love for the l? why?)
The javascript file
In this section I will walk you through a very, very basic file, which includes things I do for every project.
var w=960,h=500,
svg=d3.select("#chart")
.append("svg")
.attr("width",w)
.attr("height",h);

var text=svg
.append("text")
.text("hello world")
.attr("y",50);
I like to define variables that describe the width and length of the visualization that I am creating. By putting these in variables, at the beginning of the file, I can easily modify them in case I need to. 960 and 500 work well for visualizations that should appear on their own page, by the way. No scrolling should be necessary.
The next statement use the d3.select construct. Here, it indicates that we are going to build something on top of the element that meets the criterion that is described between the parentheses. The syntax used by that is that of css selectors, but long story short, #chart refers to whatever has an “id” attribute of “chart”. This is our lone <div> element in the html file. Then, we are going to add an svg element, which is what will hold the visualization proper in svg form, and give it a width of w and a height of h.
I always use that syntax, an “svg” variable that holds the top-level svg container, which resides in a <div> element which has an id of “chart”.
The final part of the file writes, finally, hello world proper. Note that I specify a y attribute (vertical position) else the text have its lower-left corner in the top-left corner of the browser window and will be effectively invisible.
Now, the HTML file we just created expect this file to be called “script.js”, so let’s save it under this name.
In this most simple example, we will not need a css file nor a data file. But, for the sake of discussion, let’s create a css file nonetheless.
text:{font-size:36px;}
and let’s save this under style.css (the name that, again, our HTML file expects). What this does is that it changes the size of the font to whatever the default was to a more massive 36 pixels.
The stove: a web server
As far as writing hello world, we’re done. You can load the html file you created in a browser, you should see the encouraging inscription. Congratulations!
Many visualizations can be seen in a browser directly, just by opening a local file. However, this won’t be the case for some, for instance, those who require external data. In that case, you need a web server. If you have web hosting, you may upload the files to your (remote) server, via FTP for instance, and see your visualization by typing the address of your site in the browser url bar. That said, it is a good idea to have a local web server, that is, one that runs on your computer, so you can view your files as if they were served by a web server, but with the added bonus that you can edit them and see the modifications directly without having to upload them each time you change them.
On Macs, you’re pretty much all set. All you have to do is enable web-sharing in your system preferences. Then, http://localhost/~YOURNAME will point to /Users/YOURNAME/Sites where YOURNAME is your user name. Just put your files there and go at it.
For windows, there are a bunch of solutions. The “Professional” versions of windows include the IIS web server, so, there. But beyond that, there is a lot of web server software available. I personally use EasyPHP. EasyPHP comes up with a web server (Apache), a mySql database, a PHP preprocessor and other niceties. And, as an aside, it doesn’t require administrator rights, for you corporate users.
EasyPHP installation is a breeze. When it’s on, by default, http://localhost/ points to the www/ directory in the install directory of EasyPHP, so you may want to install it in a place that suits you. Alternatively, you can create aliases in the admin panel of EasyPHP (http://localhost/home/index.php), in other words to give a name to any part of your hard drive. This is what I do, I put all my projects there and have a shortcut to that name in my browser, so whenever I want to see a project I use that shortcut and I can see the visualization as if it were on the web.
The plate: a browser
We’ve talked browsers before, and chances are you have one (or several) on your computer.
Now I wish that by browsers, we could just skip it and mean “the latest version of chrome”, but it turns out that there are slight differences in the way that browsers handle d3 code so you should really test your work in at least chrome and firefox. As of this writing, Chrome + Firefox (version 5 and up) represent just under 50% of the browser market share. If you add all browsers that are d3-capable (Safari, earlier versions of Firefox, Opera, IE9) you reach about 75% of the market. Sadly, IE8 and IE7 which account for slightly over 20% of the market are not d3-compatible, though they can use the Google ChromeFrame free plug-in and do pretty much all that chrome does.
Knives and forks: the console
At the beginning of my dad’s engineering career, code came on a punch card. People then, allegedly, thought it through. You didn’t want to be the kid who didn’t follow your algorithm carefully enough to forecast an avoidable bug and waste a perfectly good card and oh-so precious computing time.
But now? no code is perfect by the time it hits the browser. You may want to launch incomplete code to get a feel for where you’re going. You may not be too sure of whether that should be a plus or a minus in that equation and just try either because it would be quicker to correct an unexpected outcome than to troubleshoot the formula on paper. You may want to iterate, to bring newer, more complex ideas to your visualization with each change to the code. Or just try out different aesthetic options.
Not too long ago, debugging javascript was really a pain. You’d have to fire those annoying alert boxes to understand what was the value of the variables, and dispatch them manually. Fortunately, that time is gone and now is the age of the Console.
There are console functionalities for Chrome, Firefox and Safari, and while the interface slightly varies, the idea is the same. The console allows you to do three main things:
– first, to see if your code executed without errors or warning. Some of those messages can be generated by javascript, and some can be added by you if certain unfortunate conditions are met. You get the position of the error in your code, which helps you to understand what went wrong and fix it.
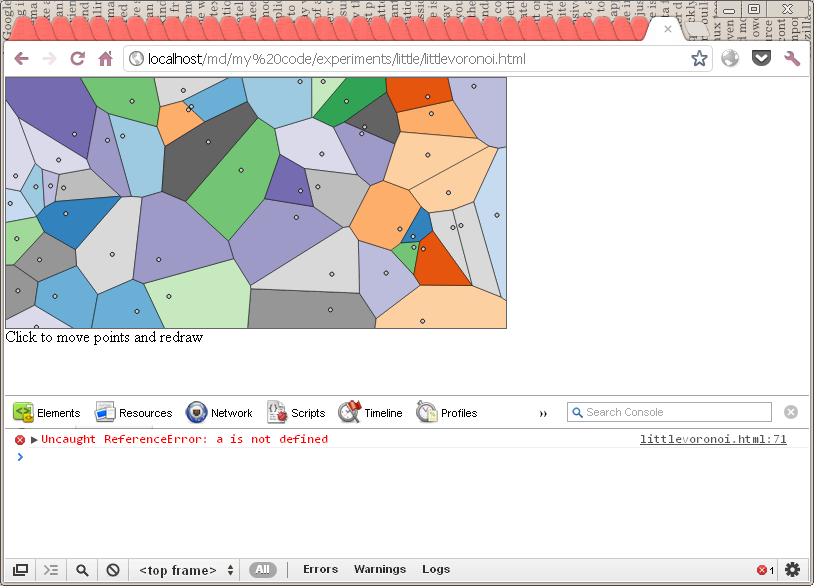
I have planted an error at the end of the code and it’s been picked up by the console which explains what’s wrong and when. Notice the red cross in the lower-right corner which counts errors. If there were warning, they would be indicated by a yellow triangle.
– second, to inspect elements, that is to find out all the information about the elements displayed on screen, even if (especially if) they have been generated at runtime. So you can see if those elements you really wanted to create have been indeed added, and if the right attributes have been passed. third, to interact with the code after it’s run (or while it runs, if you manage to pause if with breakpoints). The most common use of this is, IMO, is to check the value of variables, which you can do simply by typing their name at the console command prompt. But you can also type in one-liner javascript statements, even if they are quite complicated. So it’s a way to test your code before you write it in your script file.
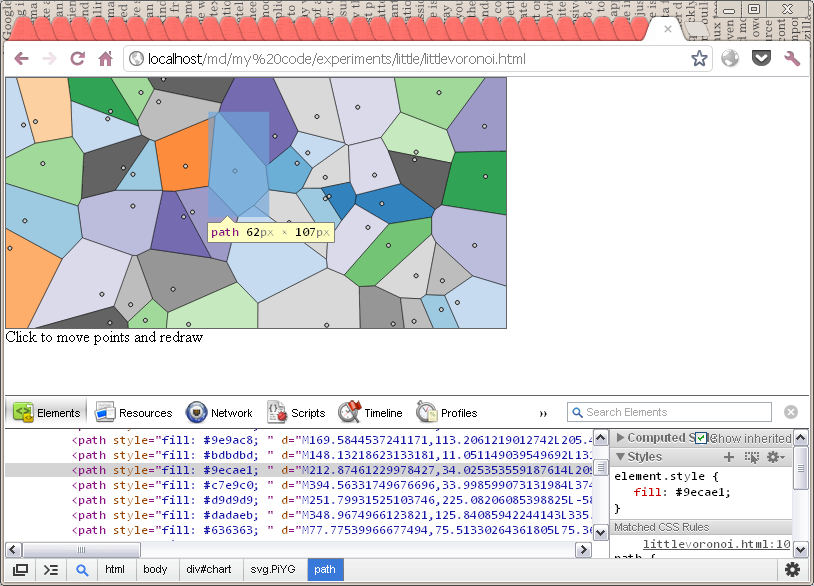
What a relief! all those paths elements that were supposed to be created in the code have been added as expected.
– third, it can be used to interact with the code after it’s run (or even during run-time, because you can pause the code with breakpoints using the console, but we won’t go into that). The most common use for that IMO is to check the value of variables, which can be changed during the code execution, but it can also be used to enter one-liner statements, which can be quite complicated. Such a use allows you to test and preview code hypothesis before you write it down in your script file, or to troubleshoot a problem that you could have difficulties seeing outside of the context.
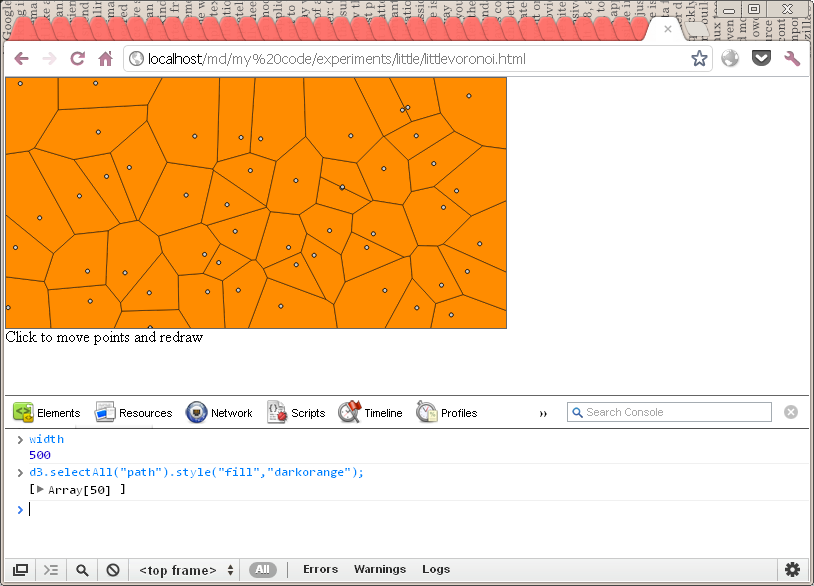
Here, I am using the console to check the value of one variable, and to enter a statement that turns all the shapes orange.
Voilà! the last thing you need when you cook food is people to share it with, same goes for visualizations!


*very* helpful for starting from scratch! thanks for this detailed writing up – merci bien…..
| text:{font-size:36px;}
…is not valid CSS.
Awesome intro to d3 – exactly what I was looking for!! Thanks.
This blog was… how do you say it? Relevant!! Finally I have found something that helped me.
Thanks a lot!
Thank you so much for putting this information out there in such a clear and concise fashion. Wonderfully done, and extremely helpful!
It doesn’t work… I know it has been some time since this post but why? I copied all as you wrote here and I get an empty screen. Otherwise, this is the only post so far in the whole internet that explains it the way it should be explained 🙂
Hi, what do you see in your console along with your blank screen?
@Anna it is probably not working because we have written in the html file. However you might have downloaded a different version on d3. As in my case, I changed the line to and it worked thereafter.
@Anna it is probably not working because you have written src=”../d3.v2.js” in the html file. However you might have downloaded a different version on d3. As in my case, I changed the line to src=”../d3.js” and it worked thereafter.